Showing posts with label quilt. Show all posts

Monday, May 13, 2013

Simply Color Quilt Continued

 Making Blocks:

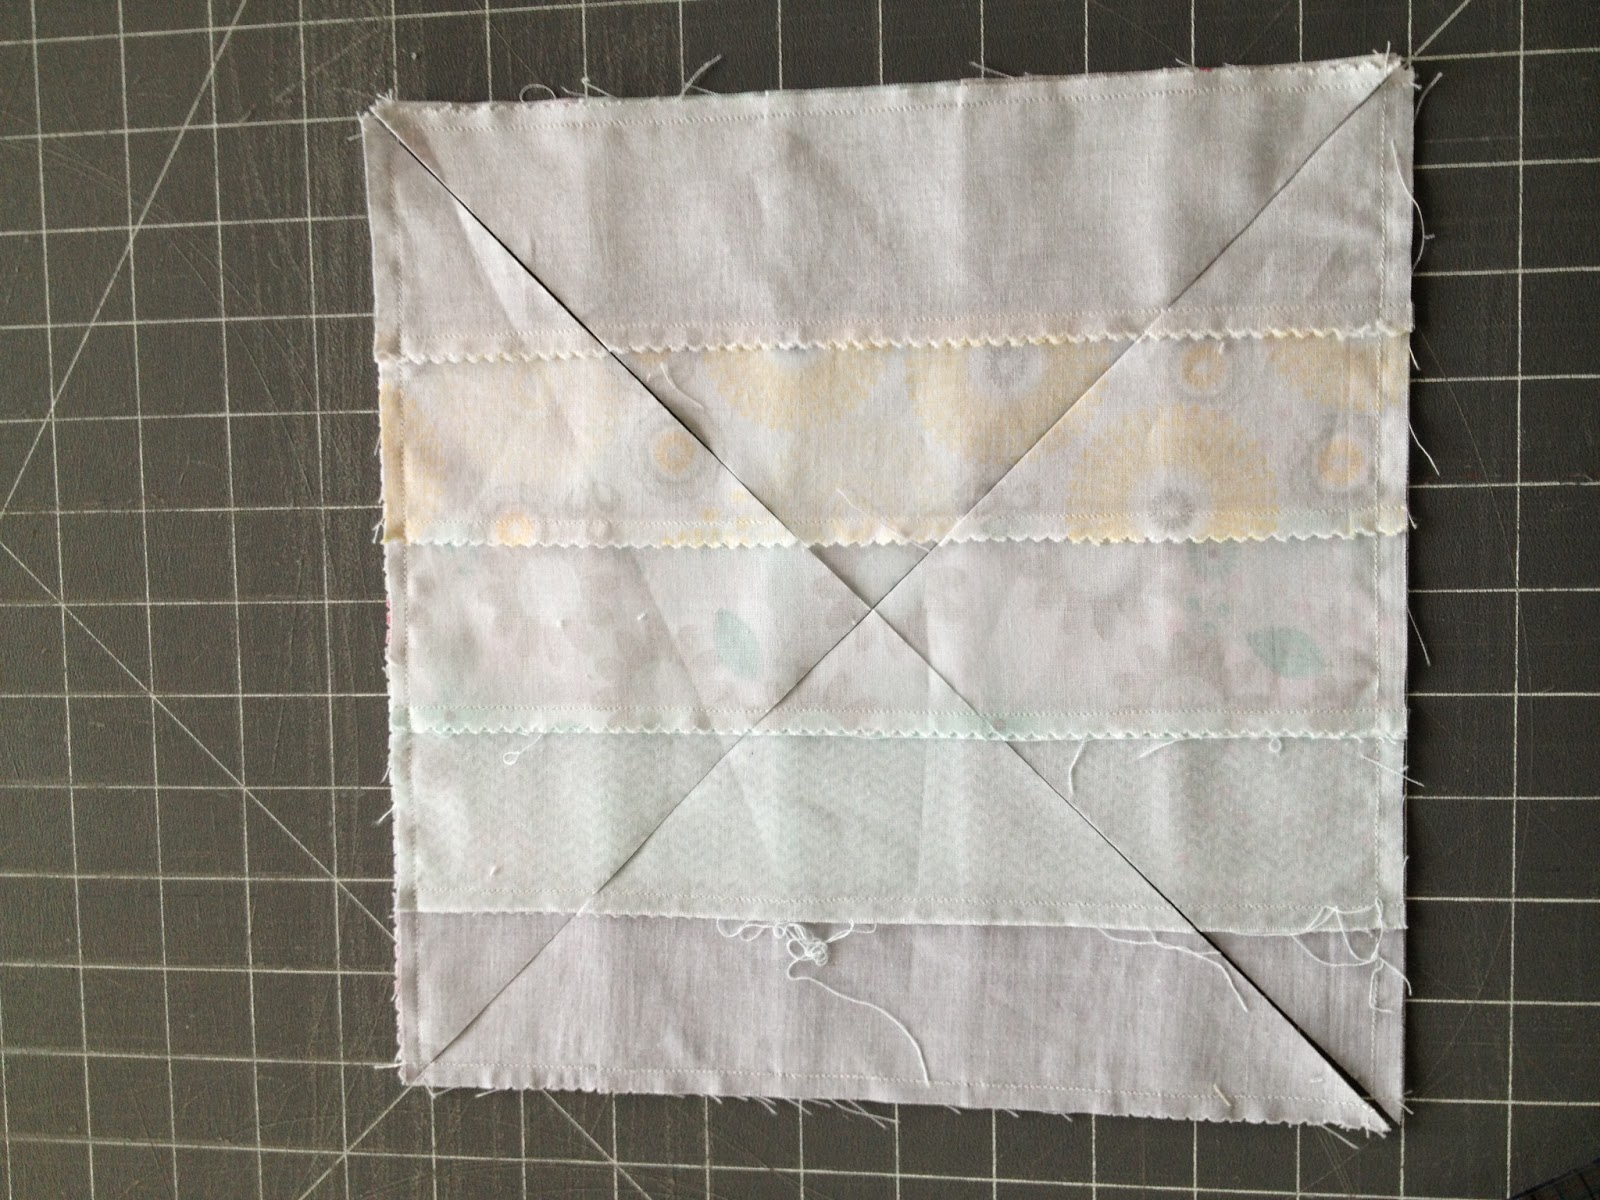
In this post I explained the first steps of this quilt. After cutting the squares out of the patterned fabric and out of the white background fabric. I paired a patterned square with a white square and put them right sides together. I marked with a pencil from one corner to the opposite corner .
 I then took all of my squares, that are marked, down to my sewing machine. With a 1/4" seam sew on each side of the marked line. To save time and thread I fed the squares in a chain.
 After I sewed down each side of the diagonal line, I cut on the pencil line through both fabrics. I prefer to do this with my shears but you can definitely do this with your rotary cutter.

 Look at all those lovely triangles waiting to be pressed!
 Next I press the seam to the patterned piece.

 Laying out the Pattern:
Now for the fun part! This is why I love half square triangle quilts so much, There are so many different ways you can put the triangles together. I went on pinterest and searched for different HST designs and tried them out. These are some of my favorites and I ended up liking the first one on the left the best.


Wednesday, May 8, 2013

Half square triangle quilt: simply color


I shared in this post a while ago about these fabrics and how I absolutely love them! I love how they correspond with the colors and patterns that I want to decorate the girls room with. The line is called Simply Color. It was designed by V& Co and it is distributed by Moda!

I acquired some fat quarters and a charm pack in this line. I have decided to make a quilt for each girls bed. This first one I am going to show you is for my two year old, K, and I am going to make it a twin size.

I decided that for this quilt that I was going to make another Half Square Triangle Quilt. I love HST Quilts, if you haven't been able to tell. I love that you can make so many different designs with just technique. I will branch out and do different kinds of quilts in the future, I promise.

I decided that I wanted my blocks to be 4.5 inches wide. So I cut strips from the fat quarters at 5 inches across. I was able to get three 5 inch strips from each fat quarter. I also cut a 2.5 inch strip from what was left over to use later for binding.


I then cut each strip to make 5 inch squares. I also cut one yard of white background fabric into 5 inch squares. This can easily be made with pre-cut charm packs. They are already cut for you at 5 inches square and come in an assortment of patterns within a fabric line.
Stay tuned for the next steps in making a HST Quilt! TO BE CONTINUED...

Monday, May 6, 2013

Split Rail Fence Quilt: Part 3

 Finishing The Quilt Top
The other parts of this series can be found here: Part 1 and Part 2

After I finished sewing all of the blocks, I trimmed them to 13 inches square. When you are making your own make sure to measure your blocks to figure out what you should square them to. This is due to differences in sewing and pressing techniques. 

A jelly roll makes 12 blocks, so I decided to lay my quilt out in a 4 by 3 pattern. As I was laying out my quilt top and decided where each block should go I was keeping color composition and pattern in mind. After I was happy with the layout I took a picture so I could look back and reference it. 

I then sewed the blocks together into strips. I like to mark each row with a post-it note with its number. I had a total of 4 rows, each with 3 blocks in it.

After sewing the rows, I then sewed the rows together to make the quilt top. When I sew quilt rows together I like to put a pin at each intersection and then one pin in the center of the block. This makes sure that the rows are perfect and the intersections line up.
 

 Also I like to make my intersections "lock" so they line up perfectly. The way I do this is I press all of the seems on one row to the left and then on the other row I press all of the seems to the right. You can see this demonstrated in the picture above.  

And now for the finished quilt top!! What do you think??
Linked to:
Craft-o-maniac
Keeping it Simple

Monday, April 29, 2013

Split Rail Fence Quilt: Part 2


Making Blocks

this Post is a continuation of the Split Rail Fence Series. If you would like to read Part 1 before continuing on you can read it here, Split Rail Fence Quilt: Part 1.

After making the squares from the group of strips, I took to squares and put them right sides together, making sure that one square had to strips lined up horizontally and the other square with its strips going vertically.

I sewed around all four edges with a 1/4 inch seem.
Then after sewing I placed the square on the 45 degree angle line on my cutting mat and cut from corner to corner.

I then flipped open my new triangles and arranged them like below. I repeated this process with every set of squares.  After pressing the triangles open sew the blocks together with a 1/4 inch seem to look like below.
Look at that lovely set of triangles just waiting to be pressed!!
TO BE CONTINUED......

Linked to:
Keeping it simple
Craft-o-maniac

Wednesday, April 24, 2013

Split Rail Fence Quilt: Part 1


As I had mentioned earlier on in the week that I would be updating you on the progress of my split rail fence quilt. I am so in love with this collection of fabrics!

First I took apart the jelly roll and divided the strips in to six groups of four strips. I then took the extra 1/2 yard of fabric that was in my quilt kit and cut six 2 1/2 inch strips the length of the fabric. I then added one to each group of four strips to make six groups of five strips.

Next I sewed each group of strips together, pressing all the seams the same way. I then measured the width of each group. The smallest group measured ten and a quarter inches. I made cross cuts on each of the strips at ten and a quarter inches, so they were square. I squared up any of the strips that may have been larger. I got 4 squares from each group of strips.

Check back later to see the next steps and for the finished quilt.

TO BE CONTINUED...

Linked to: 
trendy treehouse

Monday, April 15, 2013

Half Square Triangle Quilt


I have had a collection of bright fabrics sitting in my fabric stash for almost a year. I had planned to use them for another quilt but didn't really like it. I had cut the fabric into 8 inch squares and was wondering what to do with them.

I had recently watched a quilting class on Craftsy by Camille Roskelley. The class is called Pre-cut piecing made simple. I would recommend watching it if you are new to quilting, as I am, or just need a refresher course. She explains how to cut your fabric correctly, use charm packs, layer cakes and jelly rolls in several different quilt patterns, machine quilt and many other useful tips. I learned about half square triangles from watching this video and the hundreds of patterns you can make from them.

That got my creative juices flowing. I decided to see if pairing those colorful 8 inch squares with one of my vintage sheets, I have been collecting, would turn out cute. And guess what it did!

Any suggestions for a border or what to do for the back? I would love your suggestions.

Linked to:
Trendy treehouse 
http://whipperberry.com/

Saturday, April 13, 2013

Charm Pack Quilt

I had bought a very cute charm pack almost two years again in Sisters, Oregon. Sorry I can't remember the line of fabric it was from. It was sitting in my fabric stash begging to be used. I decided to make a floor quilt. I sewed each block into strips of 8 blocks and then sewed the five strips together.

I used a high loft batting for some extra cushion and one of my many vintage sheets for the backing. 

I decided I was going to be adventurous and try free motion quilting on my machine. It didn't turn out so well. After about 30 minutes of getting frustrated with my tread breaking and getting my quilt sandwich stuck, I decided that I needed a different plan. I decided to use my walking foot and stitch in the ditch.

I still need to bind it. Any Ideas? I have no idea what to bind it in. Any suggestions would be wonderful.


Linked to:
Craft-o-Maniac
Keeping it simple