Monday, May 6, 2013

Split Rail Fence Quilt: Part 3

 Finishing The Quilt Top
The other parts of this series can be found here: Part 1 and Part 2

After I finished sewing all of the blocks, I trimmed them to 13 inches square. When you are making your own make sure to measure your blocks to figure out what you should square them to. This is due to differences in sewing and pressing techniques. 

A jelly roll makes 12 blocks, so I decided to lay my quilt out in a 4 by 3 pattern. As I was laying out my quilt top and decided where each block should go I was keeping color composition and pattern in mind. After I was happy with the layout I took a picture so I could look back and reference it. 

I then sewed the blocks together into strips. I like to mark each row with a post-it note with its number. I had a total of 4 rows, each with 3 blocks in it.

After sewing the rows, I then sewed the rows together to make the quilt top. When I sew quilt rows together I like to put a pin at each intersection and then one pin in the center of the block. This makes sure that the rows are perfect and the intersections line up.
 

 Also I like to make my intersections "lock" so they line up perfectly. The way I do this is I press all of the seems on one row to the left and then on the other row I press all of the seems to the right. You can see this demonstrated in the picture above.  

And now for the finished quilt top!! What do you think??
Linked to:
Craft-o-maniac
Keeping it Simple

Wednesday, May 1, 2013

Upgraded boxed brownies

Brownies are a staple at our house. I decided that I would try and upgrade the regular old boxed brownies we have all the time.

I decided to make a graham cracker crust. They are pretty easy to make. Just crushed graham crackers, a little bit of sugar and some melted butter. I sprayed the bottom of a 9 by 13 pan and pressed the graham cracker crust I to the bottom of it.

I then made the brownies according to the box directions and poured them on top of the graham cracker crust. I then baked them according to the box directions. In the last 5 minutes of cooking time, I sprinkled mini marshmallows over the top of the brownies.

They were really yummy. They tasted like a fancy s'more. Enjoy!


Monday, April 29, 2013

Split Rail Fence Quilt: Part 2


Making Blocks

this Post is a continuation of the Split Rail Fence Series. If you would like to read Part 1 before continuing on you can read it here, Split Rail Fence Quilt: Part 1.

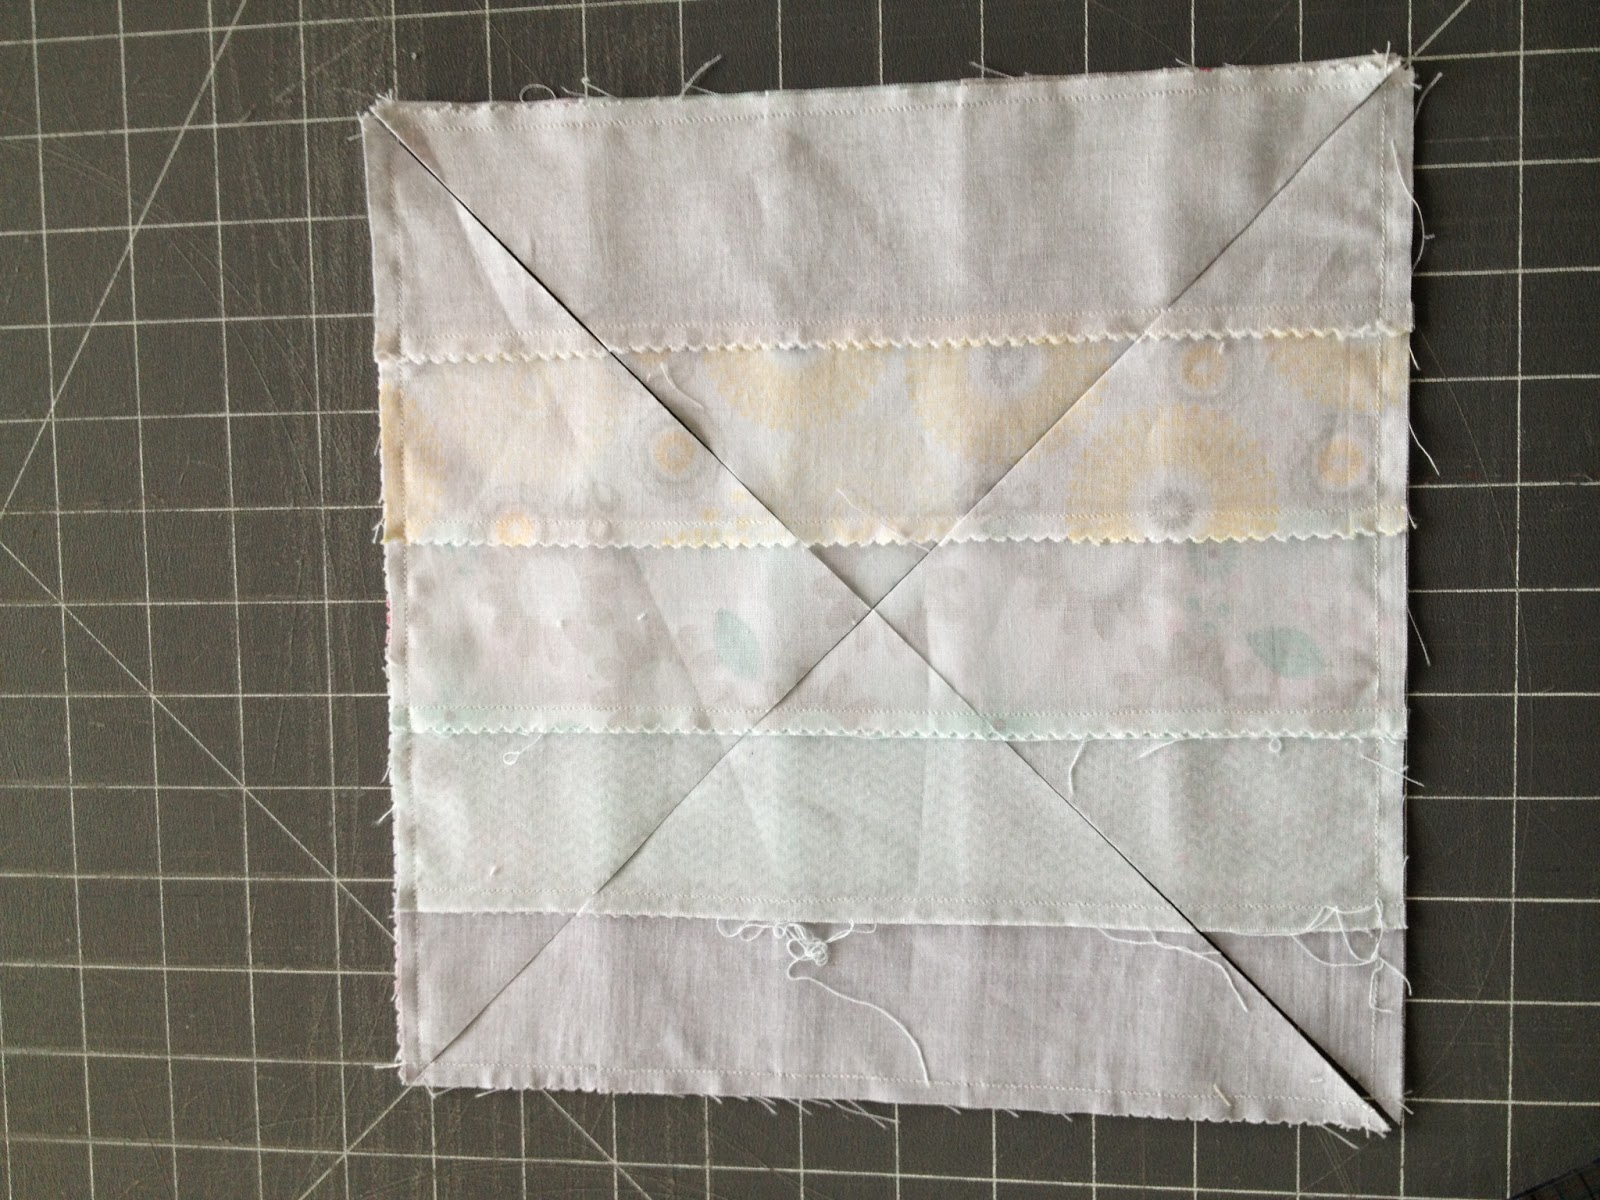
After making the squares from the group of strips, I took to squares and put them right sides together, making sure that one square had to strips lined up horizontally and the other square with its strips going vertically.

I sewed around all four edges with a 1/4 inch seem.
Then after sewing I placed the square on the 45 degree angle line on my cutting mat and cut from corner to corner.

I then flipped open my new triangles and arranged them like below. I repeated this process with every set of squares.  After pressing the triangles open sew the blocks together with a 1/4 inch seem to look like below.
Look at that lovely set of triangles just waiting to be pressed!!
TO BE CONTINUED......

Linked to:
Keeping it simple
Craft-o-maniac

Friday, April 26, 2013

Blog Schedule

I have decided that in order to organize this blog better and to better serve my readers needs, I am going to follow a schedule. We will see how this goes and it might not even work.Let me know what you think or if you have any other ideas that might help me make this blog a better place for you to visit.

Mondays: My Project Updates
Mondays will be the days that I will update you with what projects I have been working on. This will include my quilts, clothes for K&L, and other more random things I am working on that I would like to share with you.

Wednesdays: Yummies
Wednesdays I will share my favorite recipes with you. I will also be sharing, from time to time, new recipes that I find that are delicious as well. 

Fridays: Friday Finds
On Fridays I will be posting another blogger's tutorial that I find Fantastic and would love to share. I will also follow the directions in the tutorial and let you know if I find any other hints or Tips that the writer forgot to mention. Feel free to suggest tutorials that you would like to see done. These are not sponsored posts, mostly just projects that I have had saved in my pinterest that I would like to do.

I will occasionally post on Tuesday, Thursday or Saturday random thoughts and fun finds that I would like to share but for the most part Dana Loves Everyday will follow this schedule. Feel free to leave suggestions or comments if you think something needs improving or would like to see a certain project done.


Wednesday, April 24, 2013

Split Rail Fence Quilt: Part 1


As I had mentioned earlier on in the week that I would be updating you on the progress of my split rail fence quilt. I am so in love with this collection of fabrics!

First I took apart the jelly roll and divided the strips in to six groups of four strips. I then took the extra 1/2 yard of fabric that was in my quilt kit and cut six 2 1/2 inch strips the length of the fabric. I then added one to each group of four strips to make six groups of five strips.

Next I sewed each group of strips together, pressing all the seams the same way. I then measured the width of each group. The smallest group measured ten and a quarter inches. I made cross cuts on each of the strips at ten and a quarter inches, so they were square. I squared up any of the strips that may have been larger. I got 4 squares from each group of strips.

Check back later to see the next steps and for the finished quilt.

TO BE CONTINUED...

Linked to: 
trendy treehouse